Peddling petals: Columbia Road Flower Market

Hey, blog world. I don’t think I told you of my plans for this, but I’m in London, U.K. right now.
20130505-151928.jpg
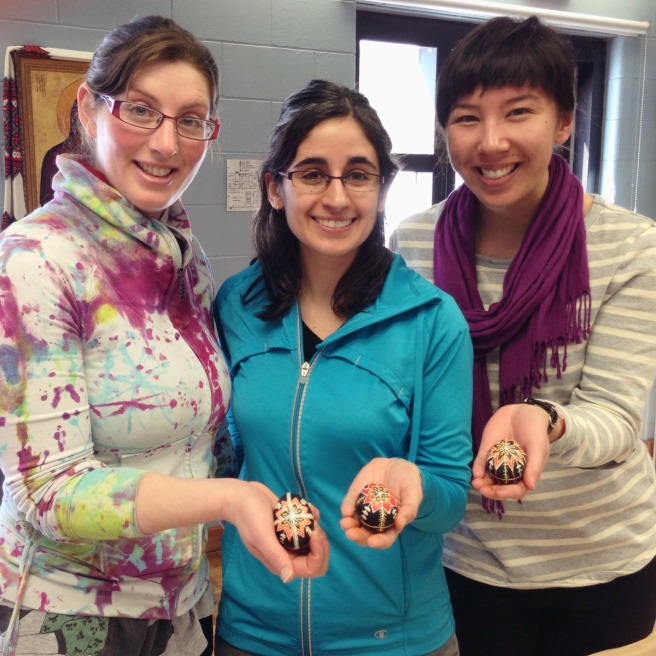
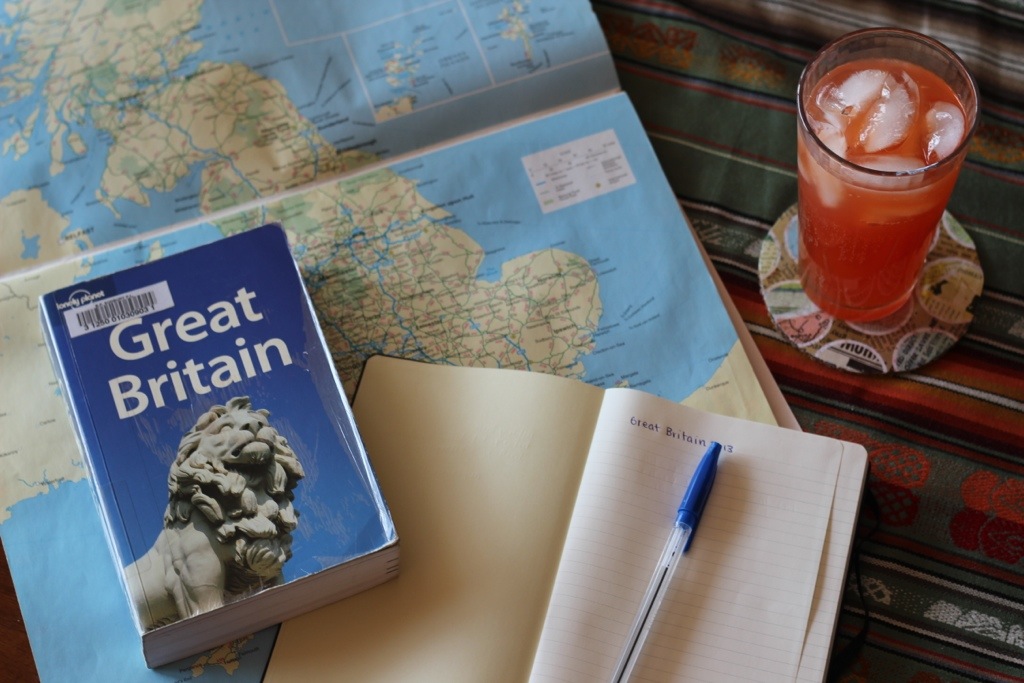
I have an entire month off work, and I decided to take advantage of the time and pay a visit to some of my best friends who are currently residing “across the pond.” Namely: Ariel and Natalie. I just arrived this morning, and, after making myself well acquainted with the London tube, found myself on the first adventure of my trip.
20130505-152144.jpg

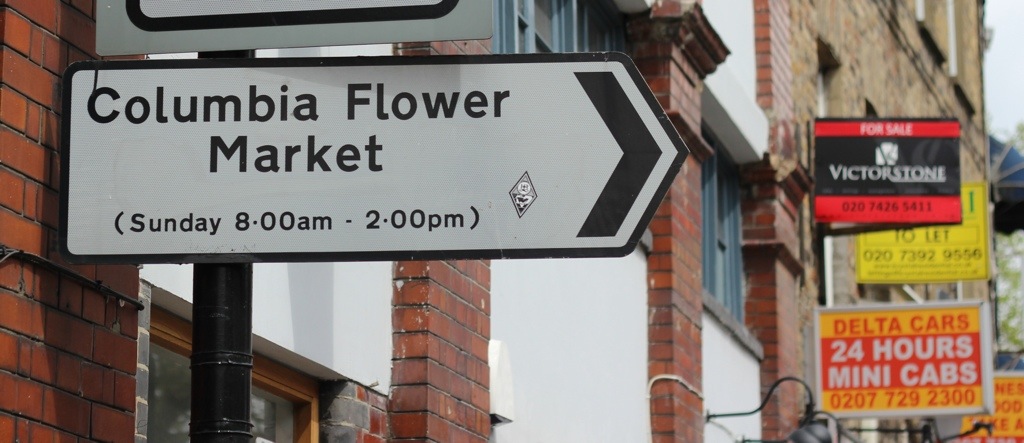
I only found out about the Columbia Road Flower Market about a week ago when Momentum Mag posted this video on their Facebook page, depicting a cute English hipster biking in the neighbourhood. I immediately marked it down on my list of places to visit, and, just as I was about to text Ariel about this newfound destination, she sent me a text proposing we pay the market a visit on my first day in town (the flower market is only open on Sundays). How’s that for a coincidence?

20130505-152408.jpg20130505-152335.jpg20130505-152352.jpg

The flower market is about a 10 minute walk from where Ariel, Natalie and Conor live. As you draw near, there are some sure fired signs you’re heading in the right direction. All things floral begin to appear; being carried in bicycle baskets, strollers, and canvas grocery carts. My favourite was a gentleman who was walking with a tall house plant. Its top was blowing in the wind and would occasionally brush the trees above the sidewalk.

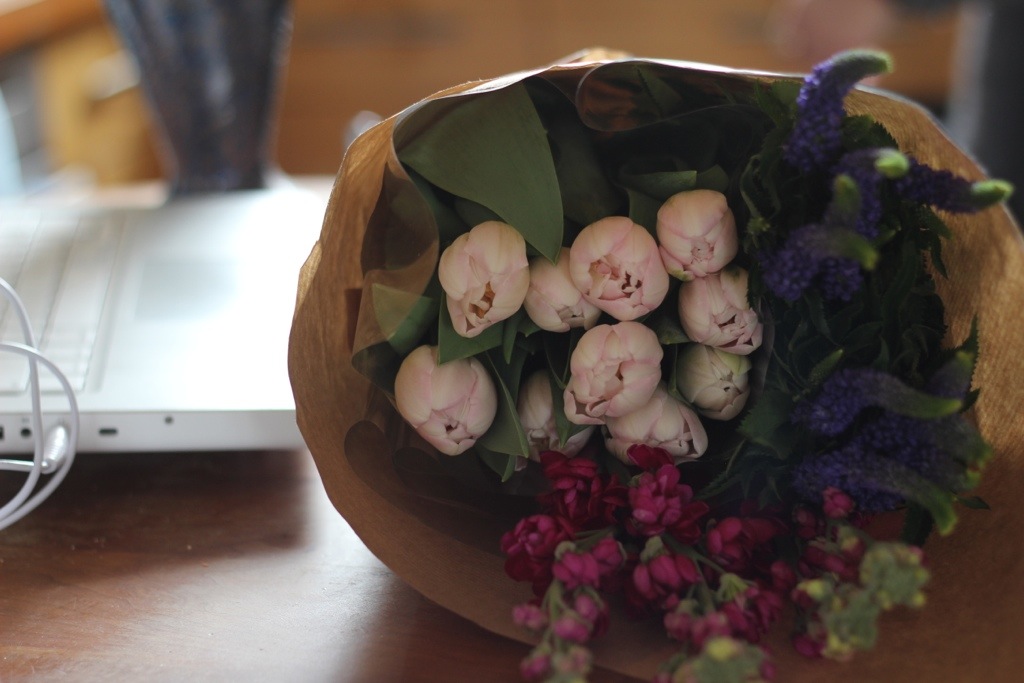
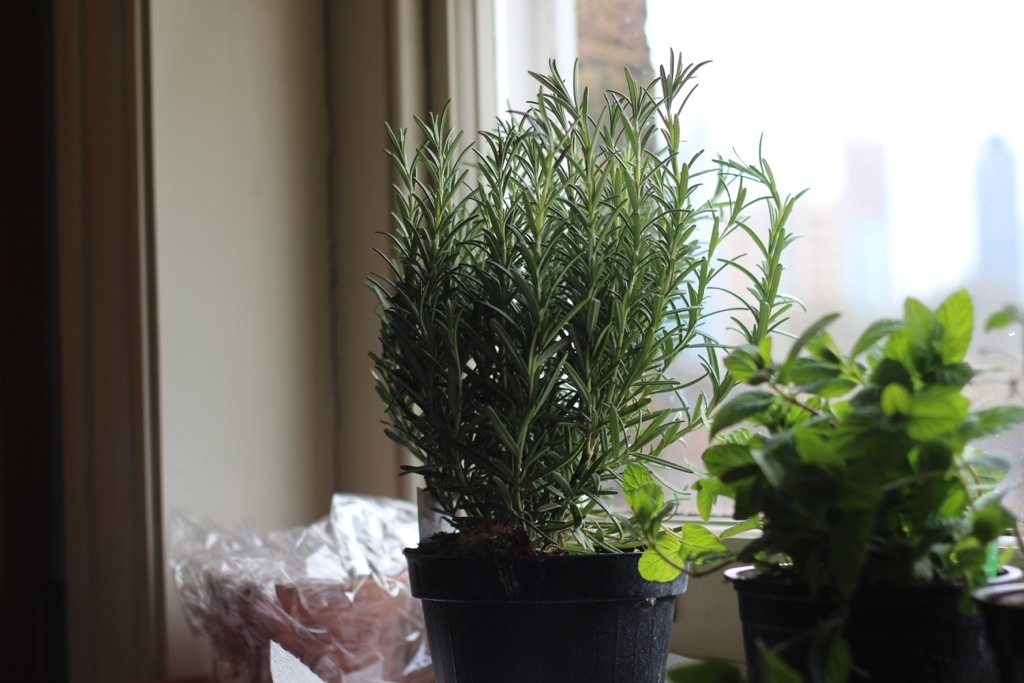
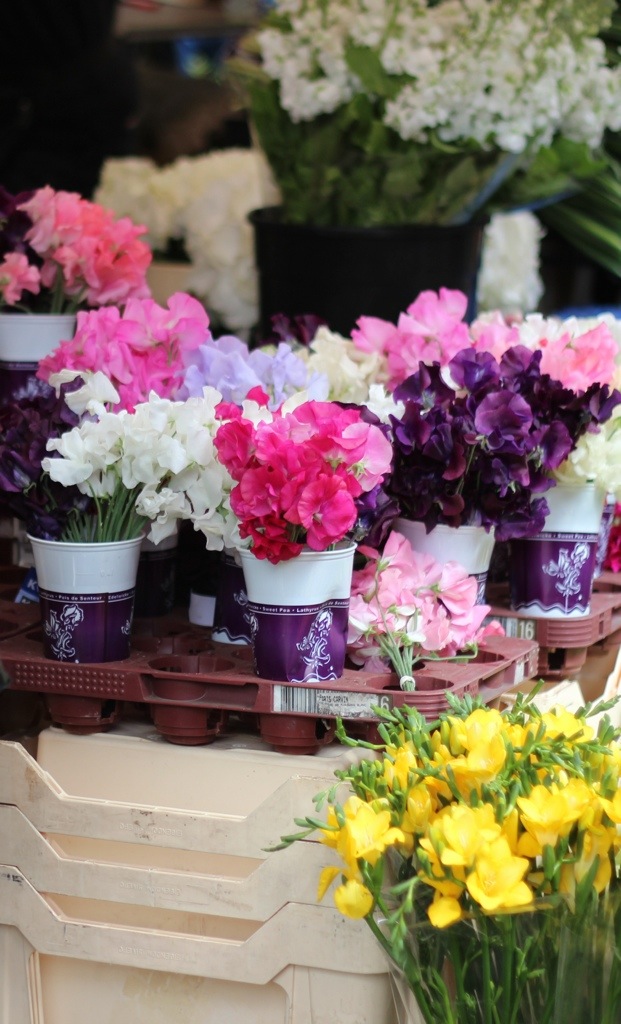
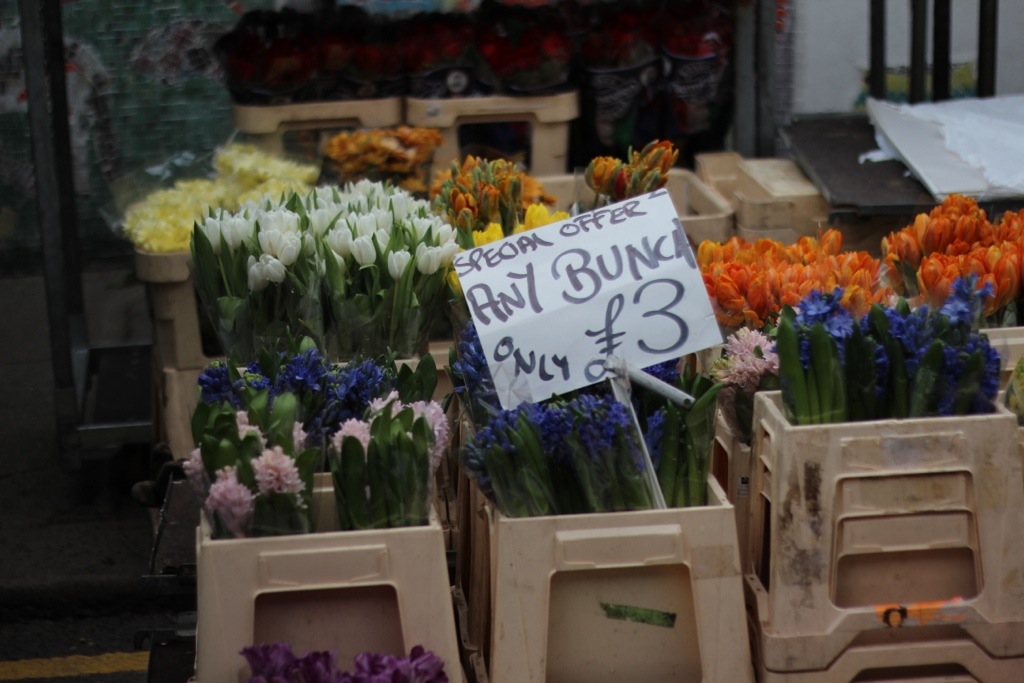
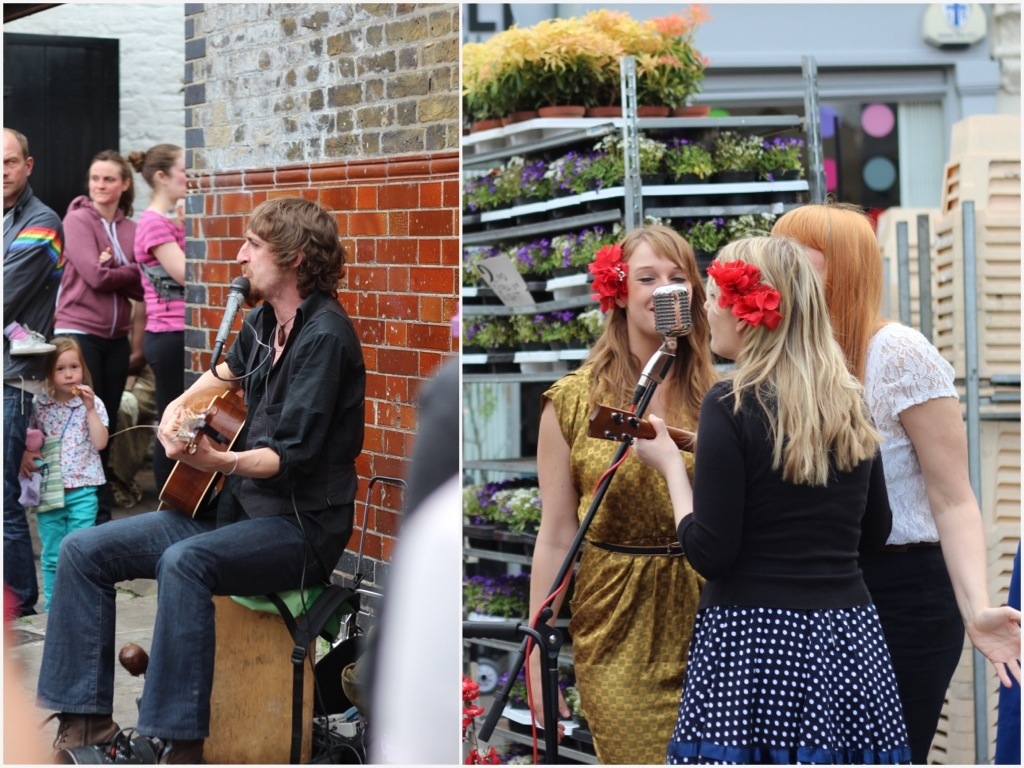
The market itself was quite something to take in. Columbia Road is already narrow, a length of street lined with artsy-looking storefronts and food places. Compound that narrowness with bunches of roses, tulips, hydrangeas, herbs and general greenery on each side of the road and you’ve got a bottleneck maze that reminded me of Ottawa on Canada Day. There was live music every block, from an accordionist playing the main theme of “Amelie” to a guitarist strumming and singing the “Jungle Book” song to a gathering of young families.

20130505-152718.jpg

While the flowers were predictably gorgeous, one of my favourite parts was something Ariel warned me of ahead of time: the flower sellers with thick Cockney accents peddling their wares onto the hordes of people. It was like Adele had been multiplied into an army of florists, their voices ringing in tandem across the crowd. Though I’m trying not to journalism-out this trip (it is my vacation, after all), I just know I’m going to return next Sunday, microphone in hand. You have to hear it to believe it.

20130505-152400.jpg

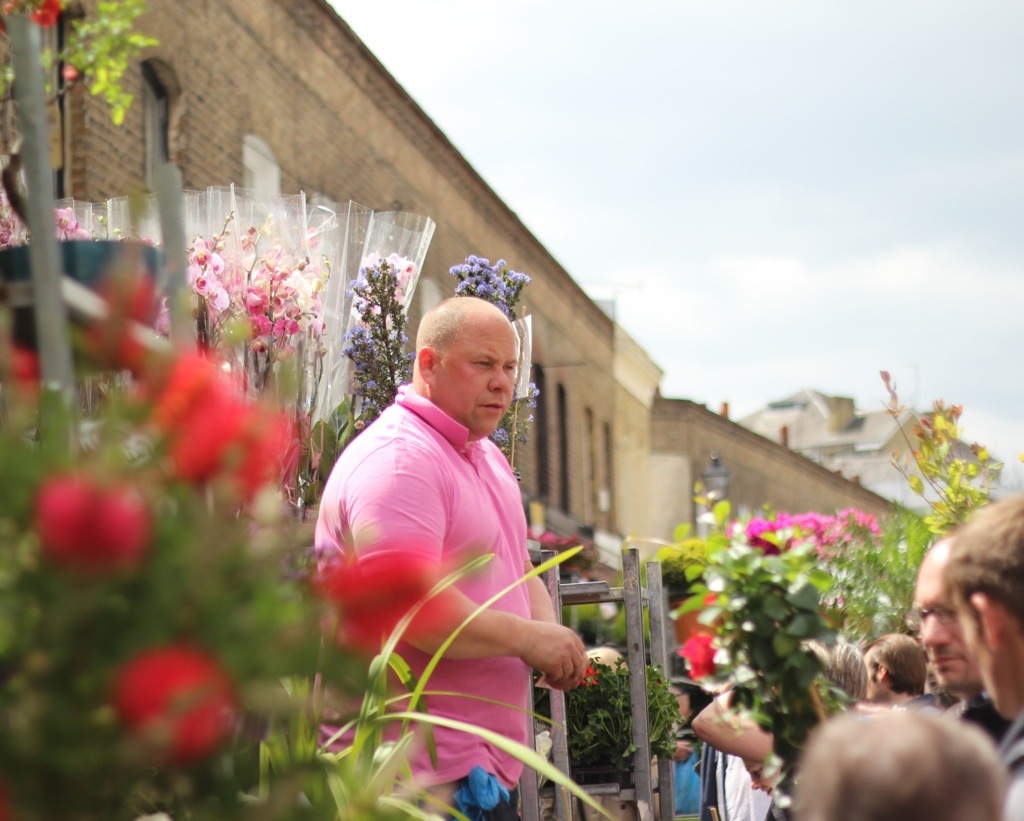
The Cockney florists put their booming voices to use when a mother and father lost track of their 10-year-old daughter, Alice. The concerned parents were yelling out her name, at which time the flower vendors took up their cause. “Oy! Everyone stop for a moment! We’re looking for a little girl, Alice. She’s wearing a cream jumper and red leggings!” This amplified across the market, the vendors passing down the message in an intricate game of “Telephone.” Ariel, Nat and I didn’t stick around for long enough to see a resolution to the search, but I hope with all my heart Alice was found.

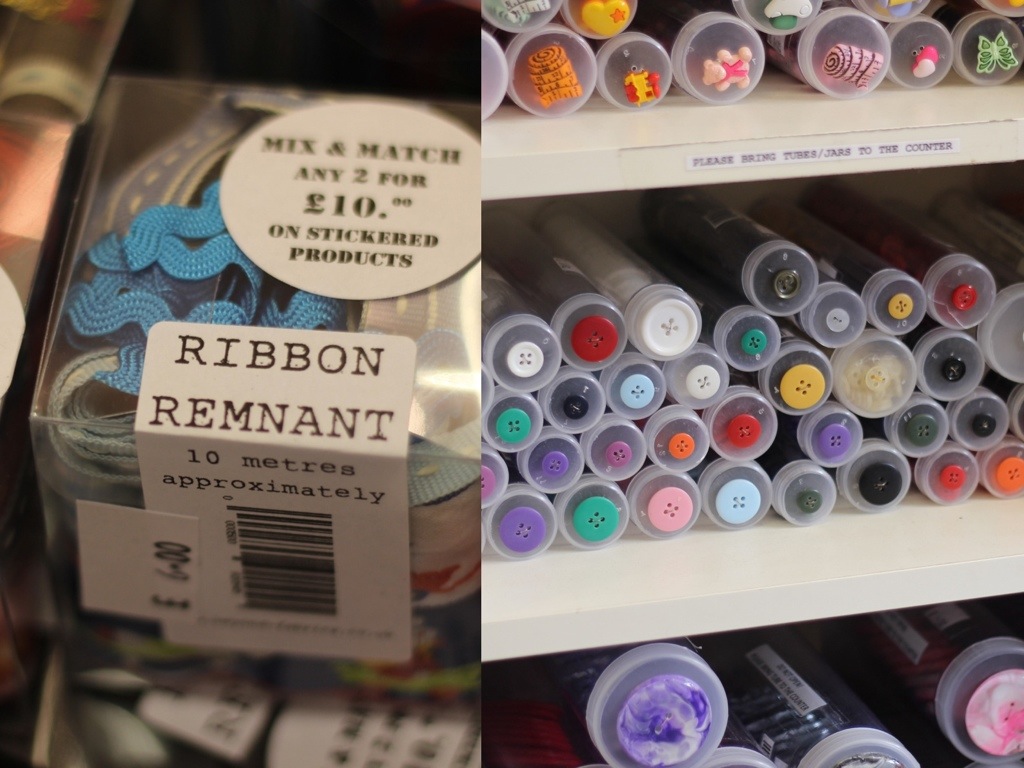
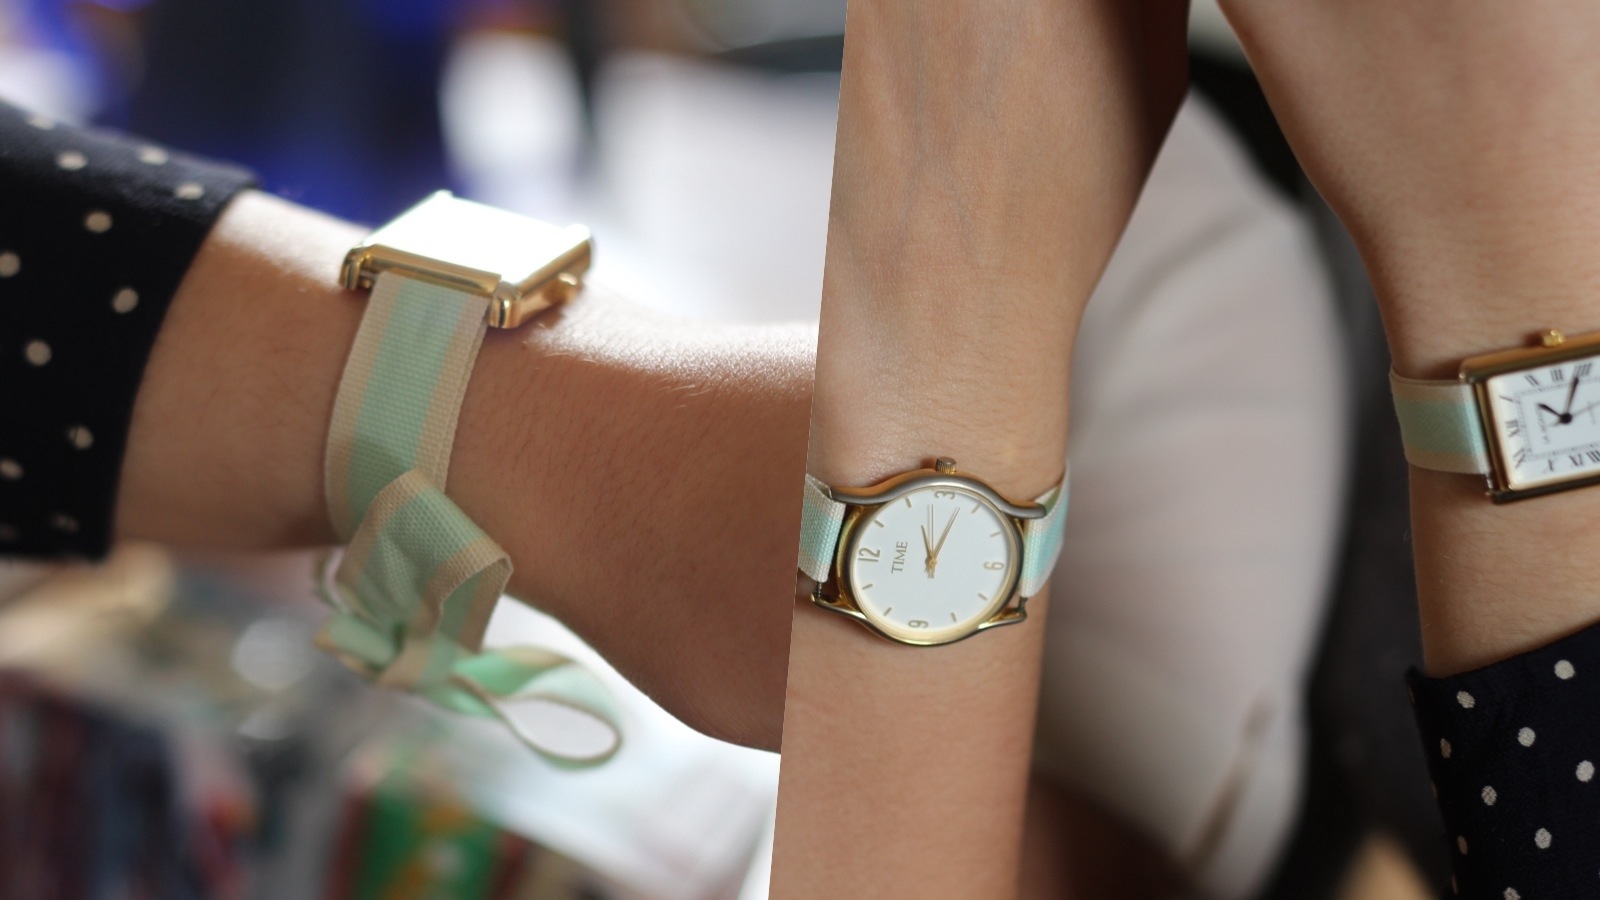
While ducking out to avoid the crowd, Nat and I also discovered a sewing shop that sold an assortment of all things Hilary: pastel-coloured buttons, assorted packs of ribbons, fat quarters, other fabric… We bought two packs of ribbon for 10 quid, and have already re-fashioned some of them into DIY watch bands (coincidentally my $10 vintage watch broke in two places just this morning). As Nat put it, “you’ve only been here for a day and we’ve already made a craft.”

20130505-153644.jpg

20130505-153655.jpg

Much more to explore…but tonight, we’re relaxing at the first of what promises to be a marathon of pub visits. Cheers!

20130505-152655.jpg20130505-152708.jpg

Discovering Printstagram

I, like many other 21st century, iPhone owning half-hipsters, am in love with Instagram. While it will never replace the photos taken on my SLR camera, it is certainly a welcome improvement to the sometimes bland and poorly lit images that my iPhone’s regular camera takes.

Prinstagram-5

I’m not really big into using a lot more of the dramatic filters (I mean, has anyone in the history of Instagram EVER used the Kelvin filter?!). Answer:

Photo 2013-04-18 10 44 10 AM

Sorry, just needed to get that out of my system.

Anyways, few months ago I discovered the website Printstagram. It’s a simple concept: you log-in to your Instagram account through the site and then you can print your photos in a variety of forms, from posters to photo books to stickers.

A number of times I would log onto Printstagram, carefully filling up my digital cart with photo goods, only to forget about the screen, and mindlessly press “Command Q” on my Mac, flushing my progress into an online dumpster. I finally decided I would get serious about my order, mostly because I had been inspired as to two ways I could put the final prints to actual use. They are as follows:

1. Print photos of Norbert.
You know Norb. He’s that adorable ball of non-allergenic fluff (thank goodness) that shows up on every blog post and social media site I have. My Instagram feed was barely tolerable before I moved in with Jen, Ian, and Norb, what with all the food photography I posted. But then I added cats. And the Internet sang and the prophecy guiding me towards the destiny of “worst online person ever” was fullfilled. Now, Norbert has become the primary subject of my Instagram photos. It’s Norbert crouching next to our orchid plant this and Norbert cuddling beneath blankets that, and Norbert giving the camera a look that balances both cuteness and mischief.

So when I saw that Printstagram could create stickers out of my Instagram photos, I knew it must be done. My original intent was to print a bunch of them (I believe there’s 250 in a pack for $10) and stick them in random places around the house for Jen and Ian to find and subsequently “oooohhh” and “awwww” over. That changed as soon as I got the stickers in the mail. I’m bad at containing my excitement for things, and immediately ran across the newsroom to show Jen what I had done. Like a kid handing out  high fives, I went around and gave cute Norbert stickers to a number of my other cat-loving co-workers, thereby convincing one of them that she wanted to print her own stickers of her cat, Murphy. See what I’ve done?

And, since 250 stickers is a lot to have made of just one little feline, I also sticker-ized some other images… from scenes of my outdoor explorations, to cute photos of my family, to a shot of the massive snowbank that once threatened to take over the front door of CBC.

Prinstagram-7

Since printing, these stickers have been sent across Canada (to Jen and Ian’s families in B.C.) and across the world (where Ariel and Natalie now have a good collection of cat stickers to hang up around their London flat). While the edges of the stickers cut off a bit of the image, I couldn’t be happier with the result of a $10 purchase. I’ve already started to brainstorm a whole series of ways these could be used for future projects.

Prinstagram-6
Stickers!

2. Print photo cards of my two-years-ago European travels
One of the things I hate about iPhone photos (or any digital photos for that matter) is my tendency to never ever print them. So they sit on my computer (or even worse, on a gigantic external hard drive packed away in my closet), only to be scrolled through on occasion, rather than admired in a frame or photo album. I had a bunch of Instagram shots I had taken while travelling across Europe with my friend Gord two summers ago. These were photos I loved – ones of all those key destinations: the Eiffel Tower as shot from Sacré Couer, a night market on the bank of the Tiber River in Rome, looking down on the mismatched roofs of Florence, à la Assassin’s Creed. Printstagram printed 24 for me for $12. They are now strung up on some photo wire on the last spare wall space I have in my bedroom.

collage europe

Annnnd here's an Instagram photo of those prints...just for good measure.
Annnnd here’s an Instagram photo of those prints…just for good measure.

Yikes, is it time to move out when you have too much art to fit in your bedroom? One day my apartment will be filled with well-placed do-dads, framed prints, and my ever-expanding art postcard collection. Also: I’ve stopped hanging things up with tacks – that means I’m a grown up, right?

Tree tapping and the science of syrup

Guys. Jen, Ian and I did the most Canadian thing ever. We tapped the maple tree in our front yard.

Ian with tree
BACK WHEN WE HAD SO LITTLE SNOW. WAH.

Well, to be perfectly honest, Jen tapped it. She macgyvered a tapping device out of a piece of copper pipe (which our metallurgist friend said shouldn’t poison the tree or us, don’t worry!) and hung a giant bucket on said tap using an S-hook and the will of a woman determined to make it work. She remains one of the most resourceful people I know.

syrup_4

The thing about making maple syrup is that it’s a process of timely refinement. In order to reach the optimal 67 per cent sugar content, we had to simmer our sap for…about seven hours. Jen has reported that our hydro bill went up by approximately $20 (we justify this by concluding that we’ve made at least this much money’s worth of syrup). As seen above, our sap was being held in a giant soup stock pot, the contents of which threatened to slosh over the side as we made our way from the maple tree up our partly snow-packed, gravel driveway. That, say, 40 cups of sap per pot then had to be cooked down to about 1/40 of its original volume.

syrup_7

So our stove has been working in overdrive the past few weeks. On the night of seven hour sap reducing, our entire house was filled with humidity. I used my fingertips to paint condensation cartoons on the walls and windows, and our basement was dank with the weight of evaporated water and the smell of cedar walls.

syrup_6

After about three weeks of tapping, this is the result of our botanical bounty:

April 13, 2013-2
Yes, that’s a gin bottle

The thing the three of us found most fascinating about the syrup was the different shades of amber (and yellow) we attained. As I learned from Dan and Tracy Seguin at their sugar bush south of Sudbury (this was an awesome story to do), the first tap of the season creates the most coveted syrup. As you can see in the photo above, our first tap was much lighter in colour and was milder in taste. It is a finer, better grade of syrup. Taps following the first yield darker syrup with more traditional colour tones. We found this to be consistent with our experience, until we got to tap number three (actually the fourth jar from the left). Tap number three froze in the bucket, when left outside on one of those “spring” evenings where it was actually much more like the depths of winter. Because it froze, the sugar layer partially separated from the water layer, making it far faster to boil down and, curiously enough, making it bear more of a resemblance to the extra light, grade A, first tap syrup. As you can see, however, we may have boiled this batch a bit too much, since it developed a bad case of the sugar crystals. Also super interesting: it tastes so much like honey!

Maple chrystals

Anyways, we’re still tapping, despite it being mid-April. There’s half a bucket of sap hanging from the tree as I type. The weather this year has really been pretty perfect for sap producers, it seems. Since the ideal maple syrup season is where the nights reach -5°C and the days reach +5°C, it looks like we could be in the midst of what is a longer-than-usual production year. Which is good, because last spring it was hot, hot, hot! Spring snowstorms (no seriously), meet your silver lining.

Norbert, wanting so badly to cause so mischief
Norbert, wanting so badly to cause some mischief

Finding Sudbury’s past in Ottawa’s present

A pleasant surprise awaited me at the Ottawa Antique Show last weekend. I was back in town for a long-overdue visit with some good friends, one of whom (Christine) accompanied me to the antique show that was being held in the Fieldhouse at my beloved, former university, Carleton.

Entering the show, there were tonnes of great, one-of-a-kind (at least in 2013) finds, including ceramic busts of Mounties and daschunds, beautifully-beaded cardigans and blazers, and depression glass in a multitude of jelly bean colours.

Just one of my purchases from the day. You know I'm a sucker for all things paper craft-related
Just one of my purchases from the day. You know I’m a sucker for all things paper craft-related

Christine, always an expert on all things fashionable, vintage, and cool, strolled alongside, giving a fascinating history lesson at each table. I learned about how Vera Neumann, finding herself short of linen during World War Two, re-fashioned surplus parachute silk into her renowned, boldly-printed scarves. Christine also told me about her other favourite scarf brand: Echo, which was founded by Theresa and Edgar C. Hyman on their pre-depression era wedding day. Their site actually has a pretty cool historical walk-through, if you’re interested. I ended up buying an oblong Vera scarf, with a brightly coloured blue and grey pattern criss-crossing the silk. It reminded me of another scarf I already owned. Despite my new breadth of scarf knowledge, however, I still plan on wilfully committing the ultimate sacrilegious act. I wear not the scarves on my neck, but rather tie them around my waist, wrist and luggage in order to serve as belts, bracelets or identifiers in this otherwise far too monochromatic world. What kind of lady am I?

April 13, 2013-14

BUT right, I was supposed to be discussing how I got a little glimpse into Sudbury’s past while visiting an indoor recreation facility in Canada’s Capital. I do get sidetracked sometimes. When browsing the booths at the antique sale, I came across two whole tables of the most meticulously organized postcards. By meticulously organized, I mean they were sorted by each county in Ontario, by each province in the country, and by each country of the world (not to mention further categories classifying boy scout images, girl scout images, transportation (public), transportation (private), ETC). The images on each spanned decades, and every card was carefully contained in a thin plastic casing, as to not be destroyed by our modern, greasy little fingers. I awaited a spot at the  postcard drawers and, when it was my turn, darted towards the Sudbury section. Oh vey! Discovery abounds. Since moving back to town nearly a year ago, I’ve become fascinated with the history of this fine northern community, particularly its downtown core, which, in the most bleak of historical moves, has been reduced to a shade of its former glory. We were a mining boom town. The main stretch used to be alit with neon lights, people could stroll from department store to department store, perhaps stopping at one of the fabulous-looking hotels that are now a dental office and Shopper’s Drug Mart (the Balmoral Hotel which then became a Zellers, and the Nickel Range Hotel where King George VI and Queen Elizabeth stayed, respectively).

Durham Street at Christmas, courtesy of a posting on the Sudbury's Fine 'Past & Future' Let's Reminisce Facebook page
Durham Street at Christmas, courtesy of a posting on the Sudbury’s Fine ‘Past & Future’ Let’s Reminisce Facebook page

Threads of inspiration and historical yearning were again tugged upon when I discovered the Facebook page, “Sudbury’s Fine ‘Past & Future’ Let’s Reminisce.” So great were the photos on that page that I tracked down the founder, Noella Church-Beaudoin, to interview for our morning show. Yes, I fully appreciate the irony of taking stock of a city’s past from the perch of one’s computer chair. (Coming back to this blog post now after spending an hour browsing the Sudbury library’s archives. Check it out! I particularly like the corner of Durham and Larch streets where I had never before appreciated that the SRO/Old Rock has maintained the magic of the former Eaton’s Department Store).

The Eaton's Building, circa 1930's. Courtesy of the City of Greater Sudbury Heritage Museums Collection
The Eaton building, circa 1930’s. Courtesy of the City of Greater Sudbury Heritage Museums Collection
CBC!!!!! The building still looks identical. Courtesy of the Main Branch of the Sudbury Library
CBC!!!!! Taken over a decade ago (1999), but the building still looks identical. Courtesy of the Main Branch of the Sudbury Library

SO, as I flipped through the yellowed images that sat in this antique show drawer in Ottawa (yes, we’re back to 2013 again), I was excited to find a few shots of downtown Sudbury, as well as of Bell Park (a central green spot near Ramsey Lake by my parent’s house). I even picked up a few shots of Creighton Mine and the Copper Cliff smelters because, what would a Sudbury postcard collection be without a few shots of smoke billowing out of concrete cigars?

My postcards (featuring a date stamp from 1936!). Click to see a bigger version.

I ended up buying seven of the cards, and would have bought them all, should they have not cost about $5 a piece. I am currently in the midst of framing them so that I can carry a portion of one of my hometowns around wherever I should go.

PS: I know this blog post will have only minimal significance to a select number of people. But come on, I can’t be the only one that has been fascinated by how development has eaten away at the history of a place. Right?

By the way, the rest of my weekend in Ottawa was just the absolute best.

A new (to me) Russian nesting dolls mural in the Glebe
Finally got to restock my coloured paper supply at the irreplaceable store, The Papery (this is now the background on my iPhone)

As well as antique-ing and afternoon beer-ing with Christine, the two days brought about a fancy dinner with Ella at Play Food and Wine in the Market (beef tartar, tuna tataki, spicy lentil fritters, tender pork belly, WINE), brunch, gelato, canal walks and elbow balloon-popping (don’t ask) with my old roommate Freya, and a surprise, last-minute pho dinner and bunny play date with Iman. So much fun.

Freya and I in the Byward Market, halfway through beautiful spring walk
Freya and I in the Byward Market, halfway through a beautiful spring walk
Fred! One of Iman's darling bunnies, who doesn't love me half as much as he loves the yogurt drops I'm about to give him
Fred! One of Iman’s darling bunnies, who doesn’t love me half as much as he loves the yogurt drops I’m about to give him

Awaiting the grand reveal: Ukrainian egg making 2013

When Jen brought forward the idea of decorating Ukrainian eggs this past weekend, I jumped at the opportunity.

Ukrainian egg4

I don’t know if it’s just me and my friends, it seems as though many people have had exposure to Ukrainian egg painting at some point in their lives. For me, it was in either grade two or three, when I was living in Sudbury the first time around. My mom and I made a set of three eggs on a mother-daughter craft date. The details of the actual painting aren’t too clear in my mind, but I do know the legacy of those eggs live on. Up until this past week, the eggs were sitting in the display cabinet in my parent’s dining room. Because you don’t empty the contents of the egg prior to painting (the membrane serves as insulation, otherwise the empty shell would become too hot and delicate when you burn off the wax with a candle) they have to be rotated every few weeks until everything dries up inside. Two of the eggs my mom and I painted a decade-and-a-half ago are still going through this drying process, and she has recently taken them out of the cabinet in hopes they’ll receive benefit from better air circulation on the kitchen window sill.

Photo 2013-03-25 5 36 43 PM
The original Ukrainian eggs made by Hilary and mom. Bunny ears courtesy of dad.

My egg painting outing this time around was with Jen, and our other friend and colleague, Martha. It was at the Ukrainian Seniors’ Centre in Sudbury. We entered the room where, over the next two hours, a set of medium eggs would be transformed into an intricate display of layered dyes.

Ukrainian egg3

Most of the people attending the workshop were presumably mothers on a  Saturday morning outing with their kids. Jen, Martha, and I look as though we could be anywhere between the ages of 16 and 30, so the two older ladies running the workshop earmarked us as high school students, an assumption likely confirmed as we rebelliously displayed our “free-spirited” egg design techniques over the next two hours.

The entrance of the seniors centre had a map of Ukraine with eggs painted in the style of the region; an Ophelia-esque flower crown, dye from 1997 (!!)
The entrance of the seniors centre had a map of Ukraine with eggs painted in the style of each region; an Ophelia-esque flower crown, dye from 1997 (!!)

The purpose of the workshop was to create the traditional “pysanka” style of Ukrainian eggs. Traditionally, the labrynth-like design was used to trap evil spirits as they penetrated a household. The design relies on the use of symmetry and quadrants and involves the use of a “kystka,” a copper funnel tool you heat in order to melt beeswax, which is then drawn onto the surface of the egg. Using the kystka is a lot of fun, and I love watching the funnelled edge gobble up the freshly melted wax.

The basis of the pysanka design, which was first drawn on in pencil. Traditionally the "arrows" you see on the lines are supposed to be pussy willows, which replace palms on Palm Sunday
The basis of the pysanka design, which was first drawn on in pencil. Traditionally the “arrows” you see on the lines are supposed to be pussy willows, which replace palms on Palm Sunday

The steps of creating a pysanka were extensively detailed in an instruction book the three of us got when we started the workshop. As you can see from the final photos at the bottom of this post, I think our eggs all captured the gist of the traditional style. They do, however, have their own signature – something that makes each distinguishable from the next. This creativity, we discovered, was not in the spirit of what the ladies running the workshop wanted. They were very sweet and well-intentioned, however they did not want us to express any of our personality on the eggs. I understand – traditional Ukrainian motifs should be respected – but we were not treading so far off the path as to dishonour that tradition. We were simply adding wheat where there should have been pussy willows, and additional green dye where there should have been black. Because much of the religious significance is lost on my agnostic-self, I didn’t feel the need to conform with the Christian symbolism. This led to a bit of backseat egg decorating. I’ll leave it at that.

Ukrainian egg20

Ukrainian egg16

In the end, I think the two ladies running the workshop were relieved to see our eggs still resembled the traditional pysanka, and that we had some level of competence that was formally doubted. Of course, the workshop facilitators are very talented and experienced egg designers themselves, and created such beauties as these beaded designs:

Ukrainian egg9

The workshop was tonnes of fun and I learned a lot – not only about how to design more Ukrainian eggs in the future, but also about Ukrainian culture and tradition.

In terms of how to create the actual pysanka design, here’s how that worked: The egg is separated into different sections – split vertically à la Greenwich Meridian and horizontally à la equator. That centre point is then intersected diagonally across the egg to create a series of eight triangles in each quadrant on either side of the egg.

Ukrainian egg12
At the top of this photo is the beeswax block used to dip the krystka in. The smell of beeswax reminds me of the mom, who used to make beeswax candles with sheets of wax bought at a flea market north of New Liskeard, Ont.

From there, an eight-pointed star is added on each side to represent the sun god (or Christ, following the advent of Christianity in Ukraine), and other flourishes are added as well. Dye-wise, you dip from lightest colour (yellow) to the darkest (black). The areas you cover in beeswax with the kystka will be immune to the next shade of dye, thereby allowing you to dip the egg in its entirety, while only colouring it in parts. At the end, you burn off the wax using the side of a candle flame, and gingerly wipe the glossy melted bits for the grand reveal. It’s all very exciting, and after two hours of covering the egg in wax and dye, it’s rewarding the see your handiwork transform into a beautiful pysanka.

The same, but different. Jen's egg, mine, and Martha's
The same, but different. Jen’s egg, mine, and Martha’s

Ukrainian eggs2